Project Proposal
For this project I am going to create three materials from scratch within 9 weeks.
I will be generating one photo-realistic material, one hand painted material as requested by the brief, and a third of my own choosing which will be another photo-realistic texture.
| Material | how long | texture | allocated | time in | blog | total |
| will it take | maps | time | unreal | update | (hours) | |
| (hours) | (hours) | (hours) | (hours) | |||
| brick wall- | 2 | colour,specular, | 4 | 1 | 2 | 9 |
| photorealistic | normal and | |||||
| ambient | ||||||
| tiles- hand paint | 2 | colour,specular, | 4 | 1 | 2 | 9 |
| normal and | ||||||
| ambient | ||||||
| wood floor-photorealistic | 2 | colour,specular, | 4 | 1 | 2 | 9 |
| normal and | ||||||
| ambient |
BODY 1- Photo-realistic material
The first material (brick wall) I intend to create is a photo-realistic material. I have chosen to create a tillable asphalt texture. I will need an original reference photo to generate a colour map, normal map and a specular map I will be able to get reference from my house as this has a good tone. I estimate it will take me about 3 days to make this texture as this is a very a detailed texture.
Process: photograph-Photoshop-3DS max
BODY 2 - Hand Painted material
The second material I intend to create is a hand painted material (tiles). I have chosen to create a hand painted tile texture. For this, I will gather some reference from the internet generate a colour map, normal map and a specular map I will be able to gather some reference for inspiration and ideas. I estimate this will take me 3 days to make.
Process: photograph-Photoshop-3DS max
BODY 3 - photo realistic material
The third material I intend to create is another photo realistic material (rock). I have chosen to make another photo-realistic texture as I think they are the best to make detailed. I will need a reference photo to generate a colour map. I estimate it will take me 3 days to make.
Process: photograph-Photoshop-3DS max
By creating these materials I will be able to further my understanding of the concepts of materials and the ways they are made and created. I will be able to use this in my advantage as I progress through the course.
Materials
In this project I will be making three different materials, I will be using normal map, specular map and diffuse map. I will be applying these to a single material which I will showcase in 3DS max. In the games industry the materials and textures are the most important thing in the game they portray style and genre.
What are game textures?
Typically a game texture is an image and often a pattern applied to a surface of a 2D or 3D model.Textures are basically images that re used in 3D games. Textures can be modified and altered to make theme have a certain feel and you can add as much or as little detail as you want.

Textures such as rock or any type of material are usually made seamless so that when you texture over the side it will still have the pattern that you wanted and wont look like its just been slapped on. as you can see on this texture above the rock formation continues over the side and would match up.
What are game materials?

Normal maps are also a good way to texture.It is again often used in games, detail can be made very well, and would create a high resolution mesh.
Tiling textures for games is when there needs a large surface area to be covered, like a brick wall or wooden floor. It would be a long process, instead you can have a small texture and tile a large surface. For this method you need the texture to be seamless and textured well so there are no obvious patterns.
When games design companies texture they use a certain amount of software here are a few examples. Photoshop has been the standard tool for many artists they have a lot of flexible tools for editing, and it is generally quite easy to make a game texture, by using through layer styles, filters and the brush tool.
Z brush
is a sculpting and painting program that can be used in games. It has a built in Poly Paint tech which is made to mimic the painting of real objects, and can be done without even assigning a texture to the object.

Photoshop
Photoshop is the most commonly used software to make textures as it has the most useful tools, as it allows us to create different texture pages and through this software you can make, normal maps, specular maps, bump maps, diffuse maps and displacement maps. you are also able to get lots of plug ins which allow a lot of tasks to be completed easier.

Quixel
This software is very useful as well you are able to make normal maps, specular maps, bump maps, diffuse maps and displacement maps. This software allows you to edit in such intense detail. You can 3D model and then bake textures you can tweak all the textures and model at the same time. You can export these type of models straight to unreal which is useful.

Unreal Engine
This engine is used to apply materials to an object to make them look more realistic. There are 4 different properties to making a material, the base colour, roughness, normal and specular. with this engine you are able to put it into the engine with high detail.
Research different types of materials
Carbon Fibre- I think that carbon fibre would be an interesting material to make as it looks slick and has a certain shine to it, this design may be simple but would still look good. Carbon fibre is thin and light and I would be able to portray it through my texture.

Gold- I think that gold would be an interesting one to make a texture out of because when it comes to implementing it into a game there are so many options such as when in C.O.D once you get a certain amount of kills you are able to apply a 'gold camo' onto your gun to show off how good at the game you are.

Coloured Glass- I thought about just putting glass in this list but then I realised all I would have to do is put a transparency on the texture, so I decided that I should choose coloured glass I think that this would be interesting to texture as I would be able to make like a stained glass window texture.

Peeling painted wood- Even though this would be a hard texture to do as you would have to add 3 dimensional effects, I think it would be a great texture to do as you can clearly see where all the light spots are on it and where all the dark spots are.

Tree Trunk- Again even though I would have to add 3d layers to this I believe this would be a great texture to do as you can clearly see where the light and dark areas are in the wood and it would be easier to map it.
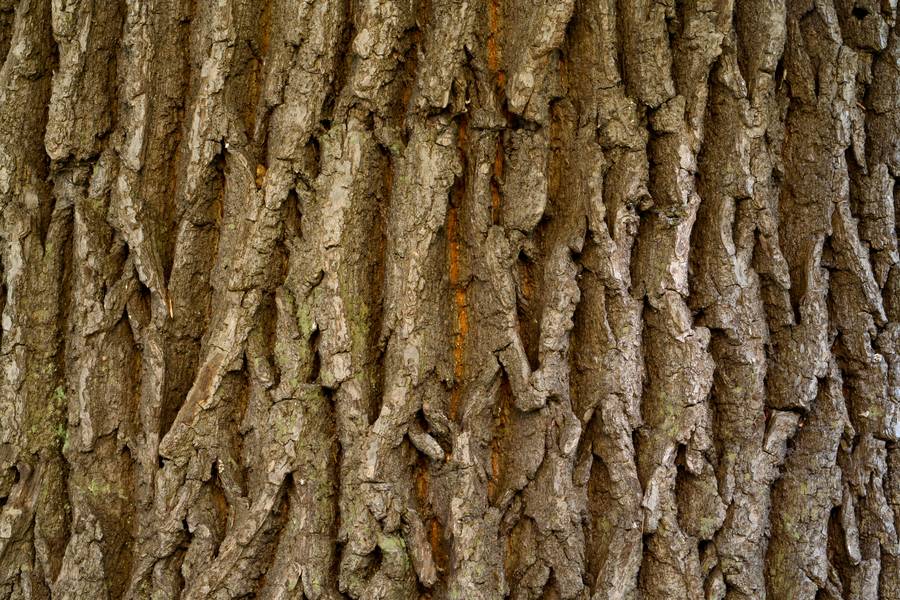
Photo realistic/ hand painted textures
This is a hand painted cobble texture you can clearly see they are not a picture because you can see all the strokes where they wanted to make it more detailed.

This type off texture would have a completely different use to a photo taken texture, these hand drawn textures are normally used in games that are going for an arty type style, basically game styles such as Minecraft and Terraria

Brick texture (Photo-realistic)
By following the tutorial given to us I was able to make my first seamless texture, with a colour, normal and specular map, this will make the texture overall more detailed and will give the texture a more 3 dimensional effect.

This is the most updated image I have off my brick wall I have now finished my colour, specular and normal maps as you can see on the right of the Photoshop page, This texture is now seamless and I was able to do that by scaling the texture to the right size and offsetting it, I was able to smudge and paint over the texture to make it seamless, I am happy with the result.

This is what the texture looks like when put into 3ds max, In the areas that didnt look 100% right I was able to select different bricks and copy them over to different places to make it blend more.

This is a close up off the final image and I believe it is quite accurate and very detailed, the colour and specular map are very small details but it just gives it that certain perfection. I was able to stick to the action plan and it took me the right time that I thought it would.
Chris's tutorial that I followed; https://drive.google.com/open?id=0B-sAeObCKnmFTnpaYTZ1TVRadm8
Tile texture (Hand Painted)

Reference:

As I am hand painting this texture I thought it was necessary to gather some reference as I wont just be using a picture I have taken, I looked at a lot of tiles just so I could widen my options, I looked at tiles inside and outside and decided on making a tile floor that would be inside.

This is my Hand Painted texture I have already started setting them in different places to start tiling them and to start making the texture seamless. I was able to make it into a specular and colour map with the allocated time I had. I was able to create this texture with the YouTube video given to us.

This was the far camera view of my tile texture, I believe with my experience of Photoshop and drawing textures, this was a good result i was able to display three dimensional aspects, I believe this would fit into a game very well something with cartoon characteristics.

chris's tutorial that I followed; https://drive.google.com/open?id=0B-sAeObCKnmFTnpaYTZ1TVRadm8
rock (Photo-Realistic)
I was able to make my third seamless texture with a colour, normal and specular map, this will make the texture overall more detailed and will give the texture a more 3 dimensional effect.

This is the final image I have off my rock texture I have now finished my colour, specular and normal maps as you can see on the right of the Photoshop page, This texture is now seamless and I was able to do that by scaling the texture to the right size and offsetting it, I was able to smudge and paint over the texture to make it seamless, I am happy with the result.

This rock texture is my favourite of the three as it has the most detail this was the hardest texture to do as it was hard to make seamless but I was able to go over it with the smudge tool and I was able to make it look professional.
Evaluation
This project requires us to make three materials, we need to make a normal map, diffuse map and a specular map. My goal was to make three high quality materials, brick, rock and tiles.The rock and brick were photo-realistic and the tiles were hand-painted.
For the first material I created a texture from a photograph of a brick wall. This was my first texture to make and one of my favourites. The things I would change about this texture is probably the way I went over this texture with the smudge tool because it made it look less 3D. Overall I do think my brick texture is made very well because it is very easily tillable. I had no problems with this texture and it was one of the easiest to make.
For the second I made my tile texture. To begin I hated my texture as I was the one making it all, I didn't really like the colour but it worked quite well in the end. I think it looked better after I made it tillable, and the end result was quite high quality. The main problem I had with this texture is that I couldnt come up with a design at first and I struggled with the design but I am happy with the way it ended up.
For the third texture I made a rock texture. I wanted to make this material because I believe it would be useful for the projects later in the year. I think this texture came out the best looking with the best looking seamless texture. Something I would change is adding a displacement map to give it more 3 dimensional effects, I made quite a few edits on this texture and this material probably took the most time. I believe that this project has helped me and defiantly improved my skills.
Overall I have met the brief and completed all the materials. This project has genuinely helped me develop my texture skills and I will be able to apply this to future projects. I have also successfully gained new skills and has gave me a lot more confidence with all aspects of texturing.
This comment has been removed by the author.
ReplyDelete